Showing posts with label recipe. Show all posts

Sunday, March 18, 2007

Maple-Mustard Pork Tenderloin for 36

My butcher has had a great price on pork tenderloin lately, so I've cooked it a couple of common meals in a row. This time, I got thinking about pork, and what would go well with it, and immediately thought of maple. And mustard as a nice complementary flavor. I went looking for ideas on the net and found a lot of people using apple cider vinegar, and that was an excellent addition - it ensured that the sauce wasn't too sweet. I served this with mashed sweet potatoes, steamed broccoli and salad.

Maple-Pork Tenderloin for 36
12 lbs pork tenderloin (about 8)
kosher salt
freshly ground pepper
vegetable oil

8 oz maple syrup
8 oz dijon mustard
4 oz apple cider vinegar, plus extra for deglazing
2 tbsp chopped fresh sage

Preheat the oven to 350 degrees.

Sprinkle the pork tenderloin with salt and pepper and set aside for at least 5 minutes.

Mix the sauce ingredients together.

Preheat one or more large heavy pans. Add just enough vegetable oil to coat the bottom of the pan. Working in batches, sear the tenderloins for 2 minutes on each side, for 6 to 8 minutes total. Place onto a baking sheet. When all the tenderloins are seared, coat them generously on all sides with the sauce. You will use about half of the sauce. Reserve the extra.

Roast tenderloins in the oven for 15-30 minutes or until they reach an internal temperature of 145 to 160, depending on how well done you like your pork. Remove from oven, cover loosely in foil, and let rest for 10-15 minutes before carving.

While the tenderloins are roasting, deglaze the searing pans with extra cider vinegar, scraping up all the accumulated fond. Add reserved maple-mustard sauce to pan and set aside. When the tenderloins are done, add any pan juices from the roasting pans, and reduce sauce by 1/3.

To serve, slice roasted tenderloins into medallions and place on platters, topped with maple-mustard sauce.

Friday, February 23, 2007

Spicy Korean Pork Tenderloin and Asian Slaw for 32

This one is adapted from a recipe in Fine Cooking. It's really easy, and really tasty. The most annoying part is pan frying all the pork pieces. I've experimented with doing them on the grill and the broiler as well, and that works okay, although frying tastes better. The marinade adapts well to tofu, which you then just bake at 375 for about 45 minutes or so.

Spicy Korean Pork Tenderloin
10 lbs pork tenderloin
2 2/3 c soy sauce
1 c rice vinegar
1 c brown sugar
1 head garlic, minced (about 16 cloves)
3/4 c minced ginger (given the quantity, I use the jars of pre-minced, but it would taste even better with fresh)
1/4 c sesame oil
1/8 to 1/3 c Sriracha or other Asian chile sauce (depends how spicy you like it!)

Trim the tenderloin of silver skin and membranes and slice on the diagonal into 1/3 to 1/2 inch medallions. Be careful not to make them too thick.

Mix the rest of the ingredients together. Pour half of it over the tenderloin. Reserve the rest for serving. Marinade the tenderloin for 30 minutes at room temperature, or up to 2 hours in the refrigerator.

In one or more griddles or large heavy pans (cast iron is great here), heat canola oil over medium high heat until shimmering. Place a single layer of pork tenderloin in each pan, shaking off any excess marinade. Be careful - it will splatter! Cook for 2 minutes, flip, then cook for 2 minutes on the other side. Transfer to a covered dish and/or low oven to keep warm while you cook the rest. Because of the sugar in the marinade, you will need to scrape or wash out the pans after a couple of batches. I kept a bowl of water, a dishcloth and some tongs by the stove, and used that to wipe out the pans as needed.

To serve, place on platters and top with reserved marinade. Sprinkle with some chopped scallions.

Asian Slaw
8 lbs napa cabbage, thinly sliced
2 lbs carrots, grated
2 red peppers, quartered and thinly sliced
2 bunches scallions, white and green parts, thinly sliced
1 bunch cilantro, minced
1/2 c canola oil
2 tbsp salt
1 c rice vinegar
1/2 c brown sugar
1/4 sesame oil
2 tbsp Sriracha or other Asian chile sauce (optional - I like to serve the slaw without any hot sauce to counter the spicy pork)

Combine cabbage through cilantro in a large bowl. Mix together dressing ingredients (oil through chile sauce, if using). Combine veggies and dressing only about 15 minutes before serving, otherwise it will be too soggy.

Wednesday, February 14, 2007

Happy Valentine's Day!

Please enjoy this virtual box of chocolates, from the the Valentine's Day collection that I offered through my fledgling business.
Top row: salty caramel, passionfruit, hazelnut praline. And in the center with the hearts, strawberry-balsamic.

The salty caramel is based off of this recipe from Epicurious. I used 2 tsp of coarse gray sea salt and only cooked it to 240 degrees. I used a very high bf content cream and butter, which made for a really nice texture and flavor to the caramel.

For the passionfruit, it's 4 ounces of chocolate, 3 ounces of cream, and just under an ounce of passionfruit concentrate.

The hazelnut praline recipe is from the new Andrew Garrison Shotts book. Caramelize some sugar, pour it over some toasted hazelnuts, and then let that cool. Break it into pieces and puree them in a food processor until it becomes a paste. The praline paste is then mixed with a little bit of milk chocolate and some cocoa butter for the filling. Very assertive and interesting flavor.

The strawberry balsamic was inspired by the Shotts book as well, although I made a lot of changes. There's a layer of strawberry pate de fruit on the top, and then a layer of dark chocolate balsamic vinegar ganache below. On the left, you can see what it looks like on the inside. The method is rather complicated, so I'm not going to post it here, but feel free to comment or email me if you want the recipe.

Here's hoping your Valentine's Day is sweet!

Sunday, January 28, 2007

Tortilla Soup for 30

This is one of the most popular meals that I make for my cohousing community, and one I get frequent requests for. It's adapted from a Cook's Illustrated recipe, and all their meticulous testing really shows in the result. Thanks to an initial "enrichment" step, the broth has a deep complex flavor, even though it starts with purchased stock. If you have 40 cups of homemade stock lying around the house, by all means use it - it will be even better. But you really don't have to.

Tortilla Soup for 30

Tortilla Strips

6 dozen corn tortillas
vegetable oil
salt

Soup
40 cups water [1]
1 jar Better Than Bouillon Chicken [1]
7.5 lbs bone-in chicken breasts and/or thighs, skin removed and trimmed of fat
5 large white onions, ends trimmed, quartered and peeled
1 head of garlic, cloves separated and peeled
1 bunch cilantro
5 sprigs oregano
10 medium tomatoes, cored and quartered
2 jalapeño chiles (optional) [2]
2-5 chipotle chiles in adobo (depending how hot you want it) [2]
3-4 tbsp vegetable oil (depending on the size of your pan)
1/2 tsp salt

Garnishes
4 limes, cut into wedges
6-8 avocados, diced fine
2 lbs of cheese (Cotija is traditional, but you can substitute shredded Monterey Jack or - better yet - put out some of each)
1 bunch cilantro, chopped
2 jalapeños, chopped fine
32 oz sour cream
rest of the can of chipotle en adobe, pureed into a sauce

Preheat oven to 425 degrees. Cut the tortillas into 1/3 to 1/2 inch strips. Working in batches, spread them on sheet pans, drizzle with vegetable oil and toss to coat, then bake for 7 minutes. Rotate pan and shake or stir strips to redistribute and cook for another 6-7 minutes or until golden brown and crisped. Sprinkle with salt to season.

In a large pot, combine 40 cups of water with the Better than Bouillon. Add chicken pieces, half of the onion quarters, half of the garlic, and the whole sprigs of cilantro and oregano to the pot. Bring to a boil then reduce to a simmer, cover and cook until chicken is just cooked through, about 20 minutes. Transfer the chicken to a platter to cool, and strain the broth into another large pot, discarding the remaining solids.

In a food processor, puree the tomatoes, remaining onions and garlic, jalapeño (if using), and chipotles until smooth. Depending on the size of your food processor, you will probably need to work in batches. Heat the oil in a large frying pan (or two) until shimmering, then add the tomato mixture and salt. Be careful - it will splatter! Cook, stirring frequently, until mixture darkens in color and starts to dry out - about 15-20 minutes (the smaller amount if you're using multiple pans, the larger amount if it's all in one).

Add tomato puree to stock and bring to a boil. Reduce to a simmer and cook for 15-20 minutes to blend flavors. Meanwhile, shred or pull the chicken into bite size pieces. Add it to the simmered stock and cook for 5 minutes to heat through.

Serve buffet style. At the start of the line, put the big bowl of tortilla strips. Follow that with the soup, then all of the garnishes.

[1] You could use canned or carton stock, but the Better Than Bouillon a) weights less, b) cost less and c) was the second place winner of the Cook's Illustrated canned stock taste test.

[2] When I make this, I use just 2 chipotle chiles for the whole batch, and no jalapeños, because I have to cater to a wide range of spice tolerance. Use the larger amounts below if you have a spice loving crowd!

Tuesday, December 26, 2006

Scalloped Potatoes

Made an excellent batch of cheesy scalloped potatoes tonight. Scalloped potatoes are very much something I make by feel - I don't usually use a recipe. Sometimes they turn out really well, sometimes I use too much milk and they're too watery. Since tonight's were a winner, I thought I should try to transcribe the recipe while I could still remember the rough quantities.

Cheesy Scalloped Potatoes (serves 4-6)

2 onions
butter
2.5 lbs Yukon Gold potatoes
salt
pepper
3 tbsp flour
2 oz sharp cheddar, grated
1.5 cups milk, warmed

Preheat the oven to 350 degrees.

Slice the onions and saute in butter with a pinch of salt until lightly caramelized. Meanwhile, peel and slice the potatoes about 1/4 inch thick. When the onions are ready, place a layer of potatoes (about 1/4 of the total amount) in the bottom of a casserole dish. Sprinkle with salt, pepper, 1 tbsp flour, 1/3 of the onions and 1/4 of the cheese. Repeat twice - you will have used up all the onions and all the flour. Top with the remaining potatoes, sprinkle with salt, pepper, the remaining cheese and a few dots of butter. Pour the milk over it all.

Cover and bake at 350 for 3o minutes. Remove cover and continue to bake until potatoes are soft - at least another 30 minutes. If you like a crusty top, increase the heat to 400 degrees for the last 15 minutes or so. Let stand for at least 10 minutes before serving to allow it to cool and set a little bit.

Sunday, December 24, 2006

Merry Christmas!


Since I can't actually give you truffles for Christmas, I can at least give you some recipes. These are from my holiday truffle sale, featuring four seasonal flavors. I ended up making over 400 hand-rolled, hand-dipped truffles. Kinda crazy!

I expect you don't want to make quite that many, but fortunately the recipes scale down easily. For all these recipes, you should let the ganache set up at room temperature for about 12 hours, then scoop them into balls. If you are dipping in tempered chocolate, it's especially important to let the balls set for 24 hours to dry out a bit and develop a crust. This will help limit cracking and leaking. But if you just want to coat with melted chocolate and cocoa powder, you don't have to wait that long.

Chestnut Truffles (about 90)
12 oz dark chocolate
24 oz chestnut spread (sweetened chestnut puree, basically)
6 oz unsalted butter
1 tbsp brandy

These turned out to be my favorite. Rich and decadent. Easy to make because I went with a commercial chestnut spread. To make, melt the chocolate and let it cool to near room temperature. Mix with softened butter, then stir in chestnut puree and brandy.

Cranberry Truffles (about 90)
18 oz dark chocolate
12 oz cream
2 tbsp unsweetened cranberry concentrate

This concentrate is really potent stuff. You can find it in health food stores. It's liquid, in a bottle - mine was in the juice aisle. Use any standard ganache method: pour hot cream over finely chopped chocolate and let stand for a couple minutes before stirring to emulsify, or melt the chocolate and combine it with the warm cream. Add the cranberry concentrate after the ganache is fully emulsified.

Egg Nog Truffles (about 70)
24 oz white chocolate
4 oz egg nog
1 vanilla bean
3/8 tsp nutmeg
2 oz rum

Steep the vanilla bean and nutmeg in the egg nog. Reheat and strain, and combine with white chocolate using your favorite ganache method. Add the rum. If you're dipping in tempered chocolate, garnish with some white choco

Gingerbread Truffles (about 80)
21 oz milk chocolate
7 oz cream
1/4 tsp black pepper
1/4 tsp allspice
1/4 tsp cloves
1/2 tsp ginger powder
2 tsp cinnamon
4 tsp molasses
1.5 tbsp ginger juice

Black pepper was the magic ingredient to make these actually taste like what I was looking for. And the combination of powdered ginger and juice from fresh works really well. Bring the cream to a boil and combine with spices. Let steep for about 10 minutes. Reheat, then remove from heat and stir in molasses. Combine with chocolate in whatever ganache method you prefer. Add ginger juice when fully emulsified. (To make ginger juice, finely grate fresh ginger, then squeeze it through cheesecloth or a towel.)

Thursday, December 07, 2006

No-knead bread in action

Like practically every other foodblogger in the blogosphere, I've been playing around with the no-knead bread recipe that I linked to earlier. The gist of the recipe, for anyone's managed to avoid it, is that you make a very wet dough that you don't need to knead. You let it rise for 12-18 hours, do a few folds to form it into a ball, let it rise for 2 more hours, then bake in a preheated heavy pan, with the lid on for the first 30 minutes. The high liquid content evaporates lots of steam into the closed pan, which helps produce a perfect artisanal crust.

My first loaf didn't turn out very well - it overproofed, so I got zero oven spring. Plus it stuck to the floured towel, so was decidedly unphotogenic. Crust was great, but the interior was overly moist and just not very flavorful. I vowed to try again.

Thanks to a voluminous thread on eGullet and Rose Levy Berenbaum's blog, I was able to benefit from the experience of dozens of other no-knead bread bakers. The enameled cast iron pot I was using is pretty wide, so my bread had a tendency to spread out. I decided to try making a larger loaf so that the bread could get an assist in rising from the sides of the pan. And I added some semolina flour and upped the salt content to boost the flavor.

This time I watched the dough rather than the clock, and decided to stop the first rise at 15 hours rather than going all the way to 18. I used rice flour on my cotton towel for the second rise, and had no sticking. Based on other's reports, I knew that leaving the lid on for the whole 30 minutes would produce a thicker crust than I'd like, so I checked after 20 minutes, and took the lid off at 25 minutes. Another 25 minutes, and the internal temperature of the bread measured 209.5, so out it came (the target temperature is 210 - close enough!). The result is the perfect (if I do say so myself) loaf you see up above! Great crust and an nicely flavored crumb. Here's the recipe I settled on:

No-Knead Bread (large loaf)

20 oz King Arthur AP flour
4 oz semolina flour
3/8 tsp rapid rise yeast
4 tsp Morton kosher salt[1]
2 1/2 cups water

Combine flours, yeast and salt in a large bowl. Add water and mix to blend - dough will be quite sticky. Cover with plastic wrap and let rise for 12-18 hours at room temperature.

When the surface of the dough is covered with bubbles the dough is ready. Generously flour your counter and turn the dough out on it. Sprinkle the dough with some more flour, and flour your hands. Fold the dough into thirds (like a letter) in one direction, then in the other direction, to form a ball.

Place the ball seam side down on a generously floured cotton towel - rice flour seems to work the best (you can make your own by grinding rice finely in a blender or spice grinder). Cover loosely with the towel and let rise for 2 more hours - dough should double in size and stay indented slightly when poked with a finger.

At least 30 minutes for the end of the second rise, preheat the oven to 450 degrees, placing your heavy cast iron, enameled or other pot and lid in the oven as it heats. When dough is ready, remove the hot pan from the oven and carefully invert the dough into the pot. It will now be seem side up. Shake the pan if necessary to even out the dough.

Cover and bake for 20-25 minutes, removing the lid just when the crust begins to brown. Remove the lid and turn the temperature down to 425 and then bake for another 25 minutes, or until the internal temperature reaches about 210 degrees.

Cool completely on a rack before cutting. (Hard, I know, but you'll be rewarded with superior flavor and texture.)
Here's a link to Mark Bittman's new NYT article summarizing the learnings of the legions of no-knead bread bakers - "No Kneading, but Some Fine-Tuning." He includes many of the same suggestions that I've incorporated above, and there's a link to the original recipe from that article.

I'll certainly be making this again. It's too easy not to! In fact, it's nearly effortless, although you do need to plan in advance because of the long rise time. If you haven't tried it yet, what are you waiting for? Now is the time!

[1] Note - If you use Diamond Crystal kosher salt, you'll only need 3 1/2 tsp. If you use table salt, it's more like 2 1/4 tsp. This is because there are big differences in crystal size between brands of salt, and between kosher and non-kosher salt.

Monday, November 06, 2006

Things to do with duck fat, part two in a series

The duck fat roasted pumpkin seeds were a success, but I still had most of a container of duck fat sitting in my fridge. When I needed a quick and easy dinner on Friday, I decided to make breakfast for dinner. Scrambled eggs, sauteed mushrooms, some home-cured maple bacon from my friend in Chicago, and potatoes pan fried in duck fat.

Duck Fat Potatoes
1 lb potatoes
3 tbsp duck fat
salt and pepper to taste

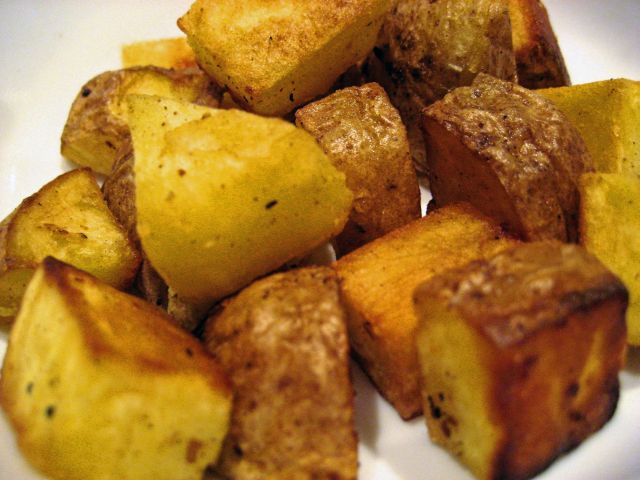
Cut the potatoes into smallish pieces - maybe 3/4 inch? You can peel them if you like - I was using some new red potatoes, so I just left the skins on. Melt the duck fat in a pan, add the potatoes, and season with salt and pepper. Put a loosely fitting lid on the pan and let cook 10 minutes over medium to medium-high heat before stirring - you want the potatoes to get nice and crusty. Stir, and continue to cook loosely covered for about 15-20 minutes, stirring very occasionally, until the potatoes are browned and crispy on the outside and cooked through. Serve hot.
There are a couple things about duck fat that make it superior to oil or other fats for this application. One is flavor - the duck fat has a lot of flavor compared to something like canola oil, and a more savory flavor profile than olive oil. So it imparts a lot of flavor to the potatoes. The day I cooked these, I was suffering from a recurring sodium sensitivity that I have. Salt-less potatoes are usually less interesting than library paste, but these were actually pretty good (although the ones my husband sprinkled salt on were even better).

The second thing is crispiness. I'm not sure the mechanism behind it (smoke point? saturated vs. non-saturated?) but I found that - as compared to oil fried potatoes - these potatoes got crispier and browner without getting greasy.

I still have about half the container in the fridge, so stay tuned for part three.

Tuesday, October 31, 2006

Everything is better with duck fat

We carved our Jack-o-lantern last night, and as I was getting ready to roast the resulting pumpkin seeds, I realized that I had leftover duck fat in the fridge from the great cassoulet adventure. Since duck fat is the king of fats, I couldn't resist trying it. My husband wasn't nearly as enthusiastic about the possibilities (it was him saying "don't do anything weird or French to them" that made me remember the duck fat), so I did a batch with butter as well, for a compare and contrast.

They're both good, but there are definitely some subtle differences. The ones with butter taste a little popcorny in a way the duck fat ones do not. The duck fat ones have a little hint of meatiness or umami.

Duck Fat Roasted Pumpkin Seeds
1 1/2 cups pumpkin seeds
2 tsp melted duck fat
kosher salt to taste

Toss washed pumpkin seeds with melted duck fat and sprinkle with kosher salt. Roast in a single layer at 300 degrees for 45 minutes or until as brown as you like them, stirring at the halfway point and later if necessary.
Mmm. Duck fat.

Happy Hallowe'en!

Sunday, October 29, 2006

Halloween Candy for Grownups

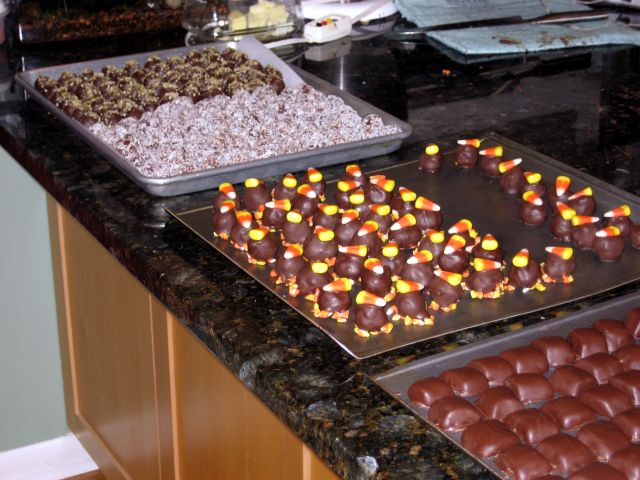
Starting last Mother's Day, I've been doing occasional chocolate truffle sales for my friends, coworkers, and neighbors. While Mother's Day and Father's Day are more typical occasions for such a thing, I decided to explore some creative flavors and market Halloween Candy for Grownups. I had orders for about 220 candies, and have been working on and off since Wednesday. Truffle making mixes periods of intense activity with long blocks of time spent waiting for things to set up. Last night was the final big push.


Here they are, all laid out and ready for packaging:
The flavor assortment:
L to R: Pumpkin Seed Praline, Coconut Ghosts, Candy Corn, Caramel Apple

For the pumpkin seed praline, I caramelized sugar and mixed in toasted pumpkin seeds, then cooled it and chopped it up fine. The ganache was 8 oz butter, 11 oz chocolate, and 6 oz of praline. These were dipped and sprinkled with extra praline. Using butter instead of cream in the ganache allows the praline chunks to stay crunchy. (Melt the chocolate, then let it get quite cool and stir in room temperature butter and then the praline.)

The coconut ghosts are 12 oz chocolate, 8 oz coconut milk, and 1 tsp coconut extract, coated in chocolate and rolled in unsweetened coconut.

The candy corn are just a plain chocolate ganache (12 oz chocolate, 8 oz cream), dipped in tempered chocolate and garnished on the top and bottom with candy corn.

For the caramel apple, I made an apple cider infused caramel, cut it into pieces, and dipped it in chocolate.
Apple Cider Caramels
2 c apple cider
Reduce to 1/3 cup, set aside.

2/3 c cream
6 tbsp butter
Heat to boil, then set aside.

1 1/2 c sugar
1/4 c corn syrup
1/4 water
Cook to light brown

Add cream, butter and reduced apple cider all at once, stirring constantly (it will foam up - use a good size pot). Cook to 250 degrees, using fairly low heat - you want to take about 10-15 minutes to get it up to temperature. Pour it into a 8 inch square baking pan that's been lined with two pieces of oiled parchment paper, one in each direction - this creates a "sling" to pull the caramel out of the pan. (If you're new to caramel making, this is a just a variation on this recipe, and the link includes more detailed instructions.)
I like the flavor, but I'm still trying to figure out how prevent the caramels from spreading so much after they're dipped - they were supposed to be nice cubes, not flat squares...

All boxed up for gift giving:
I've got the usual small amount of overrun to get rid of, as last minute sales and/or for dessert tonight for my birthday cassoulet party.

Thursday, October 05, 2006

Pasta Amatriciana with Arugula


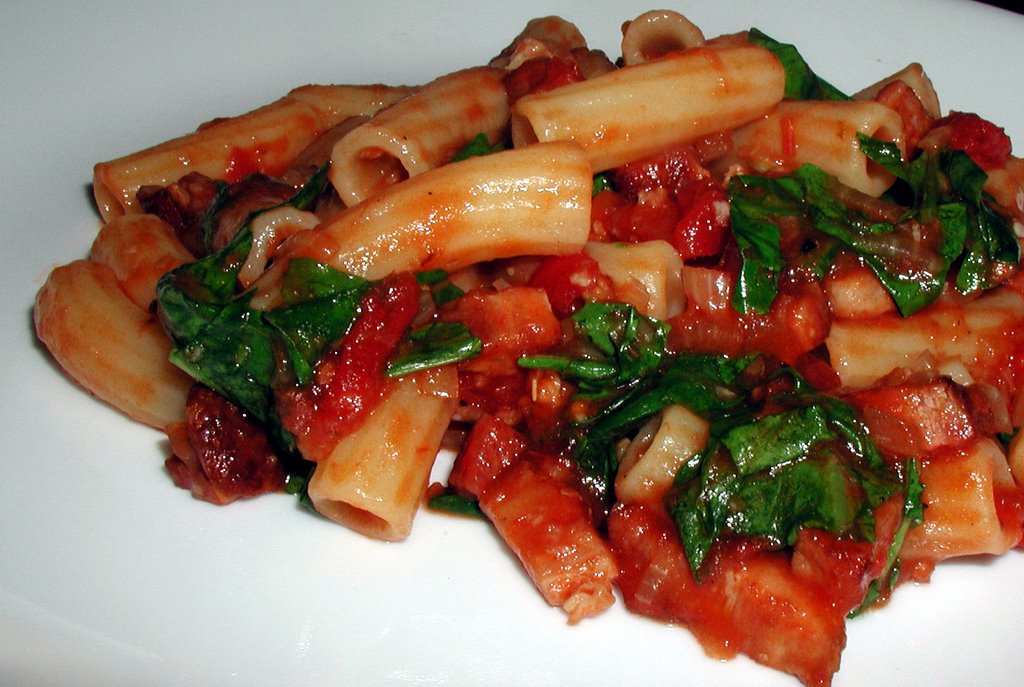
Pasta Amatriciana with Arugula
(inspired by Hathor's foodblog on eGullet)
1/2 lb pasta
~8 oz thick cut bacon, diced (I didn't weigh it, so I'm not exactly sure how much I used, but it was three slices of the thickest sliced bacon I've ever seen!)
1 small onion, diced fine
2 garlic cloves, minced or pressed
pinch red pepper flakes
1 c crushed tomatoes
large handful arugula, coarsely chopped
pepper to taste

Bring a big pot of water to boil.

While the water is boiling, start browning your bacon. When it's brown and crispy, drain off as much excess fat as you desire. Add the onion and cook until it softens. Add the garlic and red pepper flakes and cook until aromatic - about 30 seconds or so. Add the tomatoes and turn the pan down to a simmer.

Once the water is ready, add your pasta and cook until *just* al dente, maybe even a little bit the not quite al dente. When finished, reserve 1 cup of the pasta cooking water before draining. Add the drained pasta back into the pan with the sauce, along with 1/2 cup of pasta water. Turn up the heat and cook until the water is absorbed and the pasta is done, adding additional pasta water if necessary.

Turn off the heat and stir in the arugula, just until wilted. Serve immediately.

Wednesday, October 04, 2006

Spice Cabinet: Szechuan Peppercorns

Szechuan peppercorns are the newest addition to my spice cabinet. They're not actually peppercorns, but the dried fruits of a plant in the citrus family. They are only grown and harvested in Asia, and up until very recently, it was illegal to import Szechuan peppercorns into the United States due to concern about the spread of citrus canker disease. But in 2005 the ban was modifed to allow for the import of heat-treated peppercorns, and it has since become much easier to acquire them. (Even during the time of the ban they were accessible, if you knew who to ask...)

Szechuan peppercorns have an odd kind of citrusy flavor. They're sort of spicy, but in an odd fashion - they are high in a chemical that produces a sort of anaesthetic or numbing effect on the tongue. They're really unlike anything else. As you would guess from the name, they are an essential ingredient in the cooking of the Szechuan region in China. They are also a traditional ingredient in Chinese Five Spice Powder (a combination of star anise, fennel, cloves, cinnamon and Szechuan peppercorns) although white pepper is frequently substituted in prepared spice mixes in the US.

Want to know more? This site contains all the information you could possibly want, including detailed etymology. If you're just interested in the general overview, click on "discussion" in the top nav bar.

Even though they are now legal for import and sale, they're still not widely available. So when I managed to get a small supply* recently, I immediately set out to find things to make with them. I've been cooking my way through the Quick Food book that I wrote about here a while ago, and it contained a quick and easy recipe for Szechuan Chicken that I just had to try.

I have to say that it turned out absolutely wonderfully. Now, the numb sensation on your tongue is decidedly odd, and I haven't decided if that's going to turn me off of using Szechuan peppercorns in my cooking. But the overall effect was really quite tasty. I love five spice powder, and was worried that 1/4 tsp wouldn't be enough, but it was perfect - noticeable without being overwhelming. The only downside I should note is that the leftovers I've been eating for the past couple days are not nearly as tasty as the original for some reason, so I recommend eating it all up the night you make it!

Szechuan Chicken
(Recipe adapted from Quick Food)

1.5 lbs boneless, skinless chicken thighs
1/4 tsp five spice powder
1 tbsp oil
1 tbsp julienned fresh ginger
1 tsp Szechuan peppercorns, crushed
1 tsp Chinese chili sauce with garlic (recipe calls for chili bean paste - toban jian - but I didn't have any and this is what I subsituted)
2 tbsp tamari or soy sauce
1 tbsp vermouth or rice wine
1/2 c water

Cut the chicken thighs in half. Sprinkle with five spice powder. Heat oil in a large skillet until very hot. Add chicken and cook 2 minutes per side until browned. Remove chicken from pan and set aside.

Add ginger to pan and saute briefly, about 30 seconds. Add the peppercorns and chili sauce, and stir once or twice. Add the soy sauce, vermouth and water, and stir to deglaze the pan and collect up any browned bits from the bottom.

Add chicken pieces back to the pan and simmer over low heat, uncovered, for about 15-20 minutes or until done. Turn the chicken over periodically to coat with the sauce. The long uncovered cooking time will reduce and thicken the sauce. Serve on top of cooked rice - we especially like short grain/ sushi style rice in our house.

Serves 4.

* I got my small stash from Durham's Tracklements - they keep them on hand for their Thai cured salmon and will sell you some. For those who don't live in Ann Arbor, you can mail order from a number of places, including Penzey's.

Saturday, September 09, 2006

Quick Food

I love this cookbook. I'd forgotten about it for a while, when I wasn't cooking much, and recently rediscovered it, complete with many post-it-note marked recipes to try. Leafing through, I was reminded of how much I like it. It's a very stylish cookbook. Each recipe takes up only a page, with the opposite page containing a beautiful and appetizing picture. There are rarely more than 10 ingredients, but they're all real ingredients. Unlike most "quick" cookbooks, it doesn't rely on a convenience foods to make things fast. And best of all, it's a cookbook written for cooks - with only a single (small) page for each recipe, the instructions are sparse and assume you know what you are doing.

The roughly 200 recipes in this small chunky book are organized not according to ingredients or place in the meal, but by method of cooking. Pot. Pan. Wok. Grill. Oven. With the exception of a small section called Dessert, they are all main dishes. It's a little gimicky, but I think it works.

According to this article, Quick Foods is just one of a larger series of books originally from Australia (which would account for the larger than American standard number of lamb recipes). Other titles include Comfort Food, Cool Food, Veggie Food and several more. I'd say that I needed to rush out and pick up the rest of the series, but instead, I think I'll try to get through a few more of the post-it notes in this one first! On my first pass through the book, I marked sooo many recipes that I gave up marking halfway through the book, knowing that I could pretty much just open a page at random and find something interesting.

Some of the recipes I've made and enjoyed so far have included:

  • Orecchiette with mushrooms, pancetta and smoked mozarella
  • Salmon and dill potato patties with lime mayonnaise
  • Chicken breasts with mustard cream sauce
Tonight I tried out a new recipe, and was very pleased with the result. Given that I've written about both paprika and sherry vinegar recently, it's not a surprise that it jumped off the page at me and insisted on being cooked.

Pork with Smoked Paprika, Potatoes and Shallots
(adapted from Quick Foods, from Laurel Glen Publishing)

1 tbsp paprika
1/4 tsp each salt and pepper
4 thick pork loin chops
2 tbsp olive oil
1/4 sherry vinegar
1/2 c crushed tomatoes in puree
1 c hot water
1 lb potatoes, cut into 1/2-3/4 inch pieces
8 shallots, peeled
6 handfuls of arugula

Mix the paprkia, salt and pepper, and sprinkle over both sides of the pork chops. Heat the olive oil over medium in a deep pan large enough to hold all the chops at once. Sear the loin chops until browned, about 2 minutes on each side. Remove from pan and set aside.

Deglaze the pan with the sherry vinegar, scraping up any browned bits from the bottom of the pan. Add the tomatoes and the water, and bring to a boil. Add the potatoes and shallots, lower heat and cover, and simmer for about 20 minutes, or until potatoes are tender.

Add pork chops back to the pan and cook for 6 minutes or longer, until they are done to your liking. Remove from the pan. If necessary, bring the sauce back up to a boil and reduce slightly.

Divide arugula between four plates. Top each with a pork chop, some potatoes and the sauce. (Contrary to my picture above, we found that we liked this best when the arugula got wilty, so do go ahead and mound everything up together.)

Serves four.

Saturday, September 02, 2006

Grilled Ratatouille with Tempeh

I've never been a big ratatouille fan. But when today's visit to the Farmer's Market resulted in a pile of eggplant, summer squash and red pepper on my counter, it seemed like the obvious choice. Fortunately, a recent issue of Fine Cooking (my current favorite cooking magazine) contained a great article on the art of ratatouille making. I agree completely with the author's assessment of where traditional ratatouille recipes go wrong:

While there's nothing wrong with the concept of ratatouille - a medley of these vegetables accented with garlic and onion, fresh herbs, and some fruity olive oil - the execution of the dish is often a big fat disappointment for me. Most ratatouille just feels like vegetable porridge. Looking through a half-dozen cookbooks, I saw instructions to "simmer," "stew," or even "boil" - the idea being to marry the flavors of the vegetables. But for me, too much togetherness just makes the dish bland. The vegetables lose their own personalities, and the texture gets so mushy.
The author presents two solutions - one where the vegetables are individually sauteed and combined, and another where everything is chopped up and roasted together. I thought the dry heat of grilling could duplicate the roasting effect, and give a nice smoky flavor at the same time. I'm pleased to say it was a very successful experiment.

We were serving this as a main dish, so decided to throw some grilled tempeh in for protein. You could, of course, make it without the tempeh and serve it as a side dish, but we all agree that the textural and flavor contrast of the tempeh was part of what made it so good.

Grilled Ratatouille with Tempeh
Note: This is less a recipe and more of a concept, so proportions are not particularly important - these are just the amounts we ended up with.

5 very small summer squash
4 small eggplant (equivalent to one large, but I find the small ones less bitter)
1 head garlic
2 tsp chopped fresh rosemary
6 tbsp olive oil
2 onions
2 red peppers
3 tomatoes (4 would have been better)
2 pkg tempeh (1 lb total)
soy sauce or tamari
2 lemons
red wine
salt
pepper
2 tbsp minced fresh parsley
1/4 c basil leaf chiffonade

Get your charcoal grill started while you're prepping the veggies.

Trim the ends of the squash and eggplant and cut in half lengthwise. Depending on the size of the eggplant, you may want to cut them in half again. Toss the squash and eggplant with 1/4 cup of the olive oil, the rosemary, and a bunch of minced garlic. Prepare the onions for grilling - I cut them in half, keeping the root intact, but that required some messing around on the grill to get the insides cooked - slices would probably be better. Brush with olive oil, sprinkle with kosher salt.

Peel the tomatoes by cutting an x in the bottom then dropping them into a pot of boiling water for 30 seconds to a minute. The skin should easily slip off. Cut tomatoes into 1 inch chunks then set aside.

Season tempeh with some soy sauce, set aside.

By now your grill should be hot and raring to go. Load it up with whatever veggies will fit - depending on the size of your grill, you might need to work in batches. The red peppers go on whole - you want to char them well on all sides, then put them into a paper or plastic bag to steam. Cook the squash and eggplant and onion on all sides until cooked through but not too soft. Transfer all the veggies into a big bowl, then cook the tempeh until browned and a little crispy.

Moving inside, heat the remainder of the olive oil in a large pan. When it's hot, add any garlic/ rosemary that remains in the container where you marinated the veggies, plus a bunch more minced garlic. Saute for 30 seconds, then add tomatoes and a pinch of kosher salt. While that cooks and softens, cut the grilled veggies into chunks. If your onions are not quite cooked through, add them in with the tomatoes. After the tomatoes have reduced some (maybe 3-4 minutes) stir in the rest of the veggies and continue to cook. Chop the tempeh into cubes, and stir that in. Add a splash of red wine.

Taste, and add lemon juice, salt and pepper to taste. Cook for just a couple minutes longer to allow everything to heat through and the flavors to combine. Stir in the parsley and basil just before serving.

Thursday, August 31, 2006

Light Summer Pasta


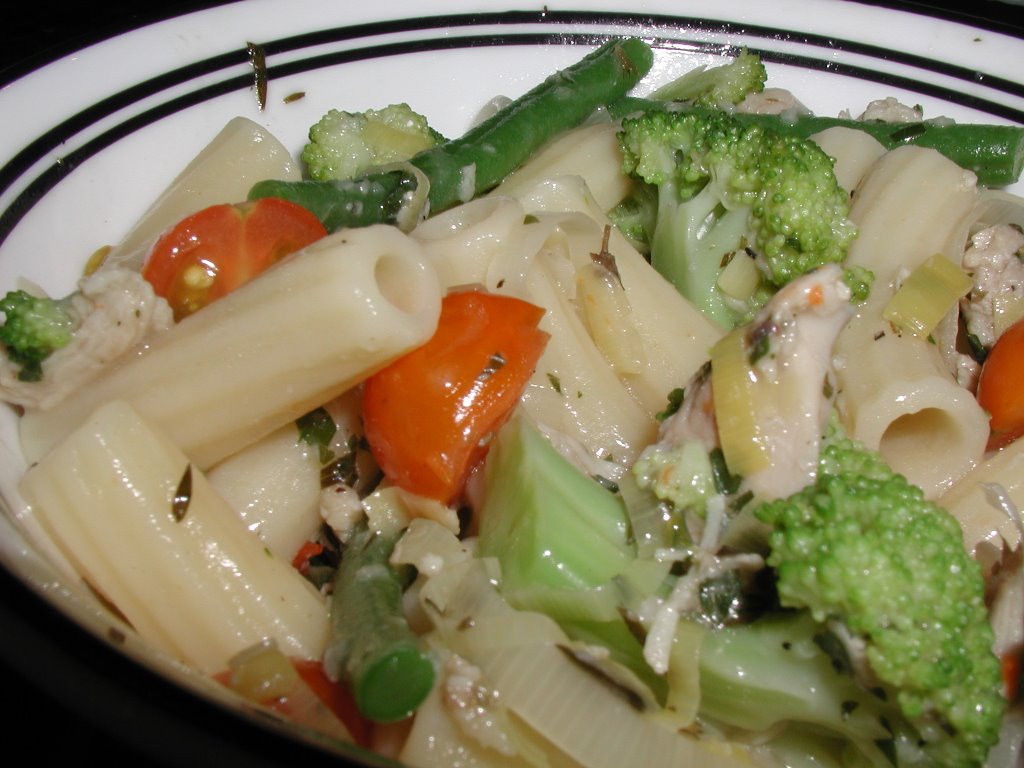
So remember that chicken I roasted earlier in the week? Tonight I turned it into a really tasty summer pasta dish that's also pretty good for you. The recipe is loosely based on one from Cook's Illustrated Janary 2005 issue, but only loosely. For one thing, I cut the fat in the recipe by about 3/4, and didn't miss it a bit.

Be sure to use a wine that you like in this pasta - a huge amount of the flavor of the pasta sauce will come from it, so this isn't the place to use up the dregs of something someone left at your house. I used a 2005 Seigneurs de Bergerac Bergerac Sec. It's one of my favorite wines for keeping around the house - it's a little bit fruity and just a tiny bit off-dry and goes with every food I've ever tried to serve it with. And at $7.99 from my local wine seller, it's got huge QPR (quality to price ratio). This French wine comes from a region adjacent to but not in Bordeaux, so it's got a lot of what makes white Bordeaux great, but at a non-Bordeaux price. (Although, to be fair, there's a lot of good white Bordeaux available for not much more.)

Light Summer Pasta
1 tbsp butter
1 leek, thinly sliced (white and light green parts only)
6 medium cloves garlic, minced
1/4 tsp red pepper flakes
2 tsp chopped fresh thyme leaves
2 tsp all-purpose flour
1 c dry white wine (but only a wine you like)
2 c low-sodium chicken stock (preferably homemade)
4 c broccoli florets
2 c trimmed green beans
1/2 lb penne or ziti pasta (I used Martelli, an excellent imported Italian pasta)
10 oz leftover cooked chicken, in pieces
1.5 oz parmesan reggiano, grated
1/2 c cherry or grape tomatoes, sliced in half (I used some tiny orange tomatoes from the Farmer's Market)
1 tbsp chopped fresh parsley
Salt and pepper

Bring 4 qts water to boil in stockpot.

Melt butter in a large skillet, and saute the leek with a pinch of salt until soft, about 2-3 minutes. Stir in garlic, red pepper flakes, thyme, and flour, and cook, stirring constantly for about 30 seconds. Add wine and chicken stock. Bring to a simmer, then reduce heat and simmer. The sauce will reduce and thicken slightly.

While the sauce is simmering, add 1 tbsp salt to the boiling water. Add the green beans and cook for 1 minute. Add the broccoli and cook for 2 minutes. Use a slotted spoon to transfer broccoli to a plate or bowl.

Bring water back up to a boil, stir in pasta and cook until al dente.

Just before the pasta is done, stir leftover chicken, parsley and parmesan cheese into the sauce and cook until pasta is heated through - about 1-2 minutes. Check the seasoning and add salt and pepper as necessary.

Combine the drained pasta, sauce, cooked vegetables and tomatoes. Toss and serve immediately. The sauce is fairly thin, so you might prefer to serve it in a bowl or just with some bread to sop up that tasty sauce.

Serves 6.

Saturday, August 26, 2006

Risotto in the Pressure Cooker

The first job I had when I moved to Ann Arbor was selling cookware at Kitchen Port, a local kitchen shop. It was an interesting job, and I learned much of what I know about cookware, knives, and gadgets during my time there.

I always had a fascination with the pressure cookers, but at over $100 for the smallest of the Kuhn-Rikons we carried, I wasn't willing to pony up the money to try one out. The promise of a pressure cooker is significant - no need to braise a stew for hours and hours, just pop it all the pressure cooker and 20 minutes later, dinner is served. But I wasn't willing to take a chance on the reality.

So when I came upon a pressure cooker for $1 at a yard sale last summer, it was a no-brainer that I would buy it. If it didn't work, or I hated it, I was only out $1. If I actually used it and liked it, I could decide if I wanted to get a more elaborate one.

It worked fine, and a year later I'm still thrilled with it. I haven't used it a lot, maybe pulling it out once a month or so, but it was only $1, so in any calcuation of meals per dollar spent on cookware, it totally wins. Perhaps this winter I'll try a few more stews and get a little more adept at using it. But yesterday, faced with a conflict between my desire for risotto and my aversion to standing over a hot stove for 25 minutes in the 100% humidity we're living in right now, I decided to try it out for risotto.

Using a pressure cooker for risotto seems counterintuitive. Afterall, the defining characteristic of risotto for most of us is that you have to stir it constantly, and you can't do that with a sealed pot. But lots of people absolutely swear by the pressure cooker version (although the method is not without it's detractors), so I thought I'd give it try.

It certainly was easy - saute some aromatics, toast the rice, add the liquid, put the lid on, and then it's just a matter of timing the cooking. There's not a lot of savings in cooking time, but since you don't have to stir, it's time you can spend doing other things. Taste wise, it was pretty good. Next time I would cook it for a minute or two less, as it had gone past the nice firmness one expects from a risotto. The chicken stock I used was unsalted, so it would have been better to add some salt earlier in the cooking process. It was a little denser than a stirred risotto, but that may also have been a factor of being a little overcooked. My husband said that, given the choice, he'd prefer non-pressure cooked risotto, but that he certainly wouldn't say no to another helping of this one.

Here's the recipe I used, adapted from The Pressure Cooker Gourmet. The recipes in this cookbook look great, and I bought it very enthusiastically, but I haven't used it nearly as much as I thought I would. Maybe a resolution for the fall...

Pressure Cooker Risotto
1 tbsp butter
1 tbsp olive oil
1 leek, white part only, cleaned and sliced (onions or shallots could be substituted)
1.5 cups arborio or other risotto rice
0.5 c white wine
3.5 c chicken stock (preferably homemade, add salt if necessary)
1/3 c grated parmesan reggiano (about 1 oz)
salt and pepper to taste

Melt the olive oil and butter in the pressure cooker. Add the leek and saute for a couple minutes, just until soft but not beginning to brown. Add the rice and stir to coat with oil. Cook for about 2 minutes, or until it starts to have a toasty aroma and the exterior looks translucent. Add the white wine and cooking, stirring, until the wine is absorbed. Add the chicken stock, then put on the pressure cooker lid. Bring up to pressure over high heat, 3-4 minutes, then lower to medium and cook for 5 minutes. Remove from heat and let stand 6 minutes (original recipe said 8). Carefully release any remaining pressure and open lid. Stir in cheese and season to taste.

This would be great with some blanched or steamed fresh vegetables and some chopped parsley stirred in with the cheese.

Thursday, August 17, 2006

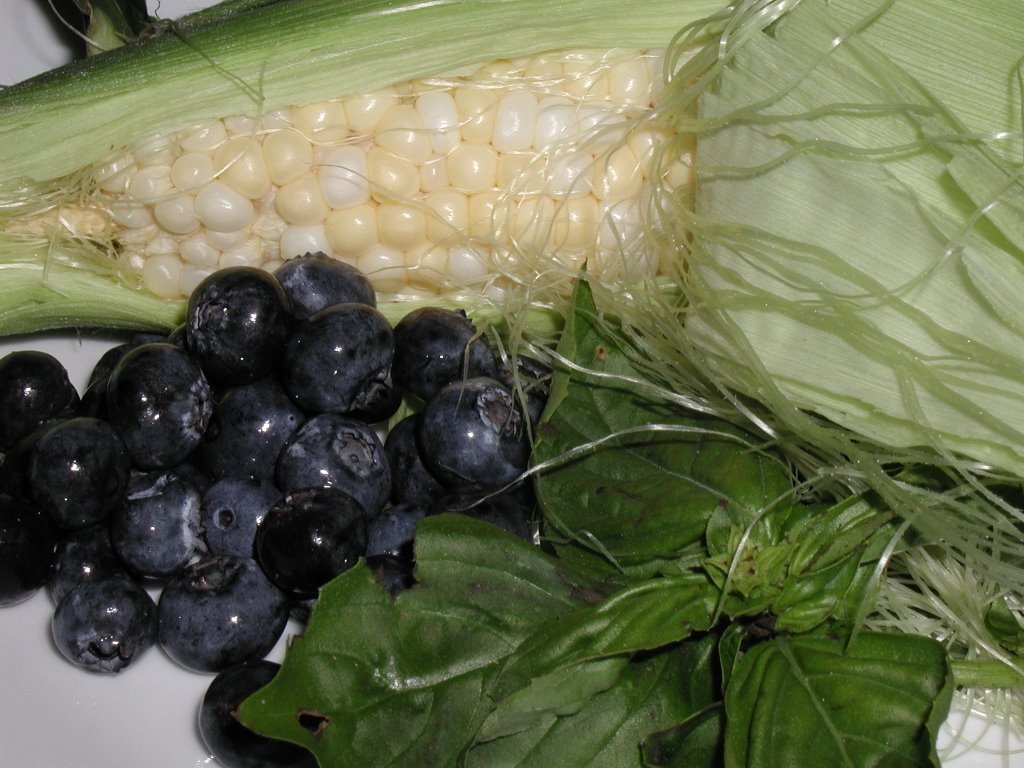
Cooking Seasonally - Blueberry-Corn Relish


We're nearing the end of what's been a great blueberry season here in Michigan. On my last few visits to the Farmer's Market, blueberries have been hard to find and more expensive. So I'm really glad I tried this recipe last week, when both corn and blueberries were in great form.

This is one of those magical recipes where a small number of simple ingredients combine to make something that's way more than the sum of the parts. Blueberries and corn might seem like an unlikely combination, but it's not only way better than you'd expect, it's really good!

Blueberry-Corn Relish
4 ears of corn, as freshly picked as possible
1 pint blueberries
a handful of basil
6 tbsp olive oil
3 tbsp champagne vinegar
salt and pepper to taste

Cut the corn off the ears and blanch in boiling water for just 1 minute. Shock in an ice bath to stop the cooking. Drain well.

Rinse blueberries and drain well.

Cut basil into a thin chiffonade. You want quite a bit of basil for this recipe, so you get a little bit in every bite.

Combine dressing ingredients and toss with the corn, blueberries and basil. Add additional salt and pepper if necessary. If possible, let stand for about a half hour before serving to marry the flavors.
I served this (along with a peach-tomato salsa) as a topping for baked tilapia. But it would be excellent as a simple summer side.

(Thanks to pontormo on eGullet for the recipe!)